I was so eager to get to the Zolatone that I forgot my wheel wells should probably go in first. The plan was just to pull out the wheel wells from storage, give them a good sanding and install. Well you know how plans go..... I started to sand and they smelled awful, that same old "50 year old trailer that was used as a habitrail" kind of smell. Then looking closer, all the rivets had pulled through the fiberglass and there were holes and cracks in more than a couple of spots. Do it once and do it right, Right?
I stripped the paint off, repaired all the weak areas with fiberglass/ filler (particularly all around the bottom flange) and West System epoxy. Then I even gave the whole thing a coat of epoxy to stiffen it up and seal in any odors. Then I re-attached the aluminum top and sanded it all to prep for paint.
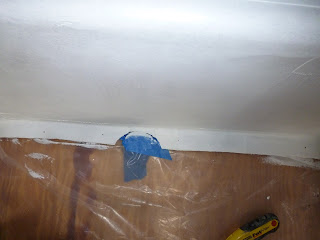
I installed it using butyl tape to seal it to the wall of the trailer. Of course after I had riveted it all in place, I realized I had never removed the paper backing on the butyl tape! So one of the wheel wells I actually installed twice. GRRRRRR... Then there was the gray water tank inlet (covered in blue tape below) that was blocked by the flange. My trusty rotozip took care of that!
I also buck riveted the door. I have a awesome hand puller that I was planning on using but of course the rivets were too close to the inner edge so I had break out the compressor and the gun. I have a really nice tungsten bucking bar that I love . Its very heavy and compact. I have small hands and I really hate how so many tools are hard to use because they are too big (like the hand riveters, they KILL my hands!) And yes, I know they make woman sized tools, but pink tools (or god forbid floral , shudder) are not a big fav of mine! Anyway, this bucking bar is sized right and does an excellent job.
I also made a patch for the water filler. Back in the day Airstream just pop riveted random strips along side of it to close the gaps, Mine looks a whole lot better! No mice highway here!
I had this awful area where someone threw up a patch to cover the old refrigerator vent. The holes were very large and if I filled them with rivets it was going to look awful. I opted to patch them all with Marine-tex. Its a two part epoxy used to patch holes in aluminum boat hulls. It did a great job patching the rivet holes and was surprisingly easy to sand. Which was a good thing because their "sag free" formula was not exactly sag free.
I promise the next post will be about Zolatone!
We have managed to have some fun this summer, just back from a week on the Cape, Great fishing - mine was the smallest fish at 21 inches and had to be thrown back so I got to take the picture instead!


No comments:
Post a Comment