Monday, August 12, 2013

Close encounters

This past week I feel like I dodged not one bullet but two!  And this has nothing to do with my airstream!

 First Maggie, my Sheltie, was rushed to the emergency room with what turned out to be a burst gall bladder.  She was operated on in an emergency hospital and is recovering nicely now.   I really thought we were going to lose her.  I know you see Finn more on this blog but that's because, well..... He's always in my way!  Maggie on the other hand is my "once in a lifetime" dog.  She was a rescue, became an agility dog for my son and is the smartest dog I've ever owned.

Turns out that some Sheltie's have a genetic condition that causes a mucocele in gall bladder.  Kinda of like a ticking time bomb.  Thankfully my sis was here and encouraged me to take her in immediately and have exploratory surgery because the surgeon said that if I had waited she wouldn't have made it.

Second event was this morning, I was walking Finn on a trail, we usually go about three miles in the morning.  I hear all this crashing to my right and see a huge black bear running on a diagonal right for us!  Finn turned into a barking snarling monster and the black bear stopped,  faced us and then after what seemed like a million years turned and walked across the trail and entered the woods on the other side.   I was still about 1/2 mile from the car and I admit I covered that ground way faster on the way back! I'm not ever taking that trail again either.    I think I sat in the car a good 10 minutes with the doors locked  ( I know bears can't open car doors but ....)  before I stopped shaking enough to drive.

Here's hoping this coming week will be less eventful, there's only so much excitement a gal can take!


Thursday, August 8, 2013

New locks for the compartment doors


 Here's my compartment door lock, corroded and without a key.  Time to replace with something better!

Does anyone remember Mello Mike?  He used to post on the Airforums, (had an Overlander) but now runs a very informative blog here.  He wrote a post about baggage door locks that I found to be very interesting.  Ditching the worthless CH751 rv locks!


His comment about the site being confusing was spot on,  but they were very nice on the phone, just have your old lock in front of you when you call and Brenda will walk you right thru it!

 A couple of days later these showed up in the mail, they are very well made. Made in USA and have good instructions. Note the instructions are only in English and a single page!  No extra trees had to die to produce instructions in 14 different languages!

Note:  I ordered the same lock cam (the straight piece of metal in the picture that holds the door shut) as my original.  However, because I beefed up the interior seal (I wanted the compartment door to lie flush with the outside skin) and by using this medium D seal the cam no longer fit. 

I had to call the company back and sheepishly admit I'd ordered wrong one and asked for  the 1/4 inch offset that looks like this.

Brenda was very nice and shipped them out the same day for a very nominal fee of $1.50 each.   Excellent AMERICAN company with great service.   They also guarantee that no one in your geographical area will have the same key as you do!  They assign a key code to you the first time you call and if you wish, all future orders can be made to have the same keying.  There's also a special key they send you that will "fix" the lock if it ever jumps out of alignment.

OKOKOK   I know you want pricing and they are a little more expensive. At the time of this writing I paid $11.35 a lock with $3.00 for the additional dust cover.  The dust cover protects the investment and looks cool IMHO. 

Installation of the lock was pretty straight forward with just a few speedbumps.

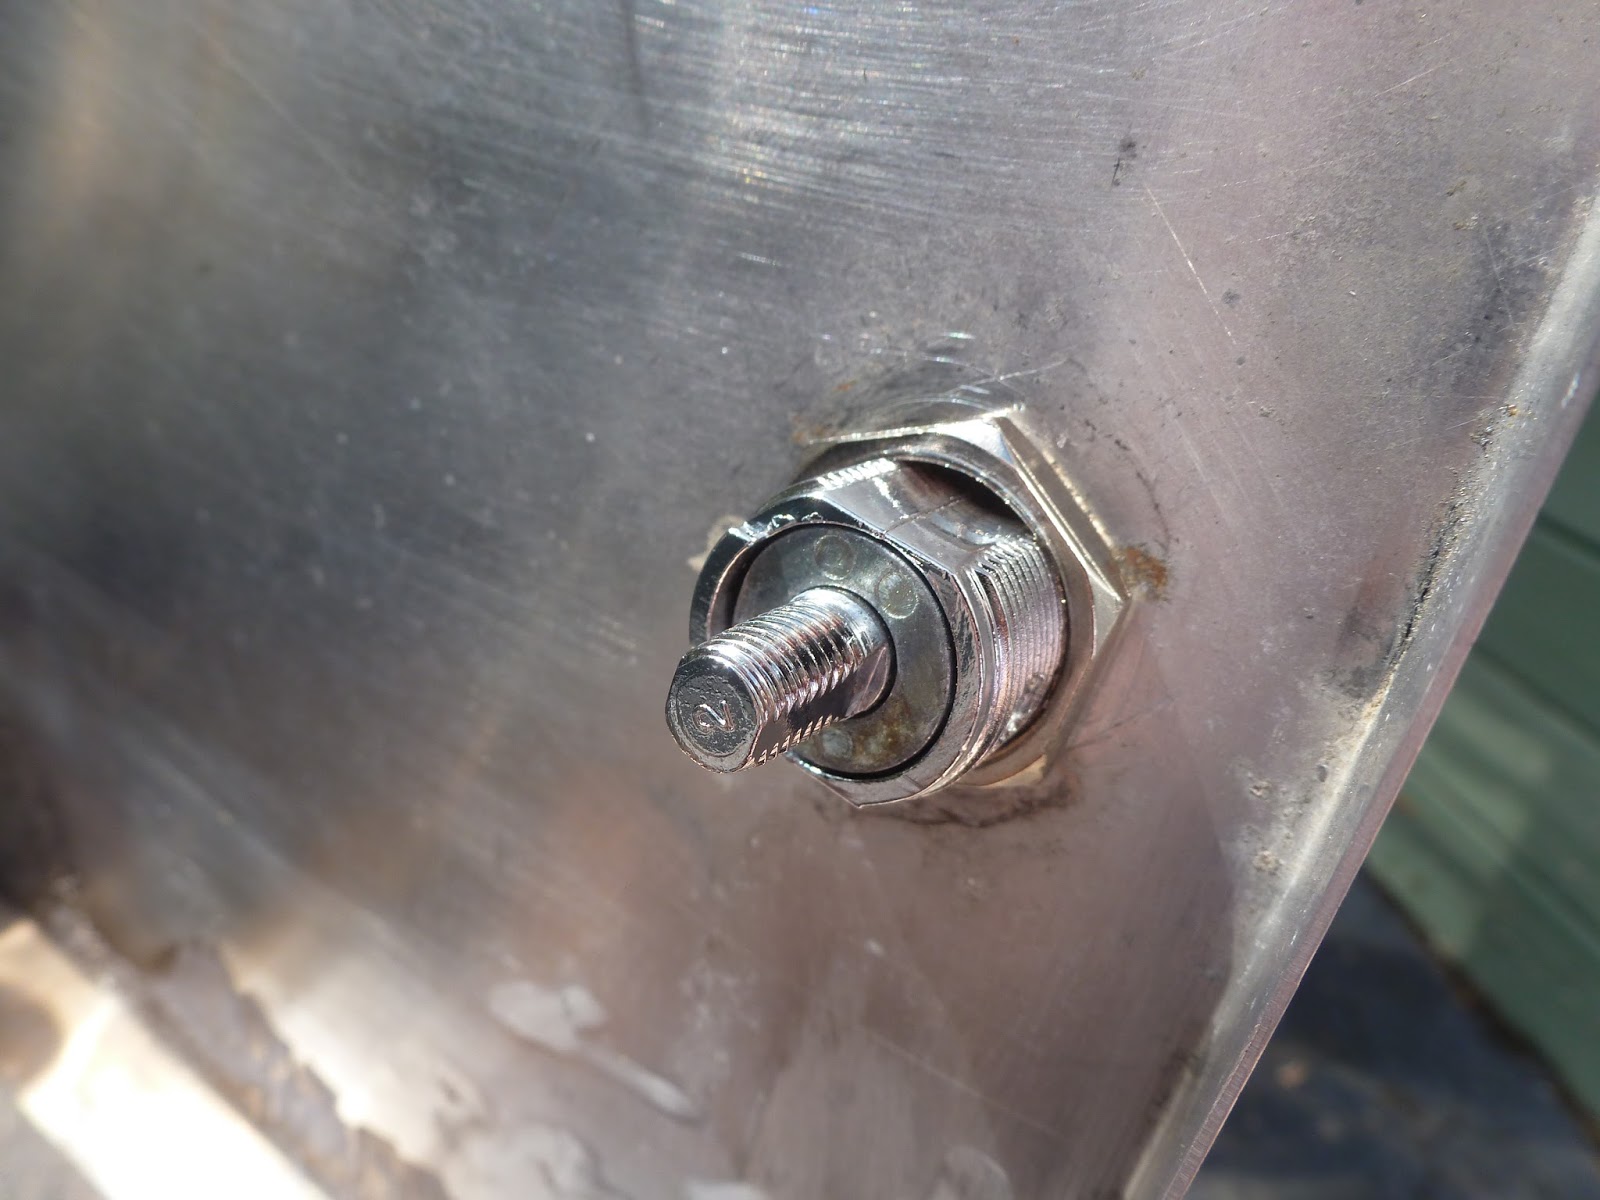
The directions don't say to install the lock dust cover after the washer but I assure you it doesn't look right the other way.  How do I know?  I had to re-drill all the rivets out of the compartment door and start all over!


This is the correct way.... notice how the hinge is slightly offset, this insures it won't scratch your freshly polished aluminum skin.
 Then add the mounting nut (slightly bronzy in the picture)
The next metal piece is called the governor.  It sits snug up against the lock, I pulled it out a little so you could see it
 Now temporarily add the nylon mounting nut, just slightly snug.  No, you don't really have to do this, but if you don't you'll wish you had.  Read on..... well someone's got to read to the end of this post!LOL


 Rivet the back door in place.  If you didn't add the nylon locking nut you'll risk the governor falling down into the space between the two doors.   Raise your hand if you know where this is going!  Yep, the first time I did this I had to redrill all the door rivets out again to retrieve that little piece.
 NOW take the nylon nut off and add your cam (with the correct offset of course) there is additionally a little square space you can add if it improves the fit (it comes in the kit)
 Ta da ! , The finished product!

Wednesday, August 7, 2013

New life for the compartment doors

My compartment doors all leaked, big surprise.   So I decided while I have the skins out to remove them from the trailer and clean them up.


And there was plenty of cleaning to do on the frame, I used  both Citrastrip and mineral spirits (no - not at the same time!) to clean off the gunk.   It took a while. That is an understatement.  I used a lot of good old fashioned hand work.


I drilled out the pop rivets on the sides of the door and revealed the interior, thankfully minus any skeletons.  There was a surprising bit of corrosion, due to water intrusion I'm assuming.  I did some fairly serious grinding with a dremel to get rid of it.  I contemplated getting a glass bead blaster like this but didn't know if it would work.  Anyone use one of these?


Re-insulated with Prodex using strips of Prodex to maintain an airspace.

I just used Tremco 635 as an adhesive, my intention was to use 3m 4200 adhesive but it runs $30 a caulking tube and has to be used up within a day or so.  Still planning on using it for the rest of the insulation but not worth it for this application.

Two layers of Prodex because I am an avid admirer of overkill!
Test fitting


Instead of  Tremco 635 or butyl tape I decided to use Eternabond to attach the compartment frame to the airstream skin.  I figured in tape form it would be cleanup friendly, and it's praised highly in other RV forums.  Plus if it doesn't work out it's one of the few areas I could uninstall and install without removing the interior skins again!


Clean frame, ready to go with Eternabond already applied and holes punched with a bamboo skewer.  This stuff is STICKY. I butt cut the corner seams horizontally as a vertical seam is more likely to leak.


Ready to rivet, actually I discovered I didn't have 1/8 inch rivets so I drilled them all out to 5/32 and replaced the gold clecos with the black ones.   I actually test fit this before adding the Eternabond.

Did I mention this Eternabond stuff is sticky and that it never really hardens or forms a skin like Tremco?

I cut away any "squeeze out" with my plastic razor blades the remaining Eternabond would stick to itself (reminds me of the postertack that you use on your walls to hang posters without damage) so I used little balls of it to clean off the residue.

With some work I was able to get a good clean edge.  I have my suspicions that it's going to catch and hold dirt, but it was leak proof in the last few down pours!  We'll see - I'll report back later on how well it's doing.  I intend to use it to install my fantastic fans, but in that application it will be covered by 4 inch wide aluminum Eternabond tape so "squeeze out" removal won't be an issue.  I liked it well enough that I'll use it for the rest of the compartment doors.

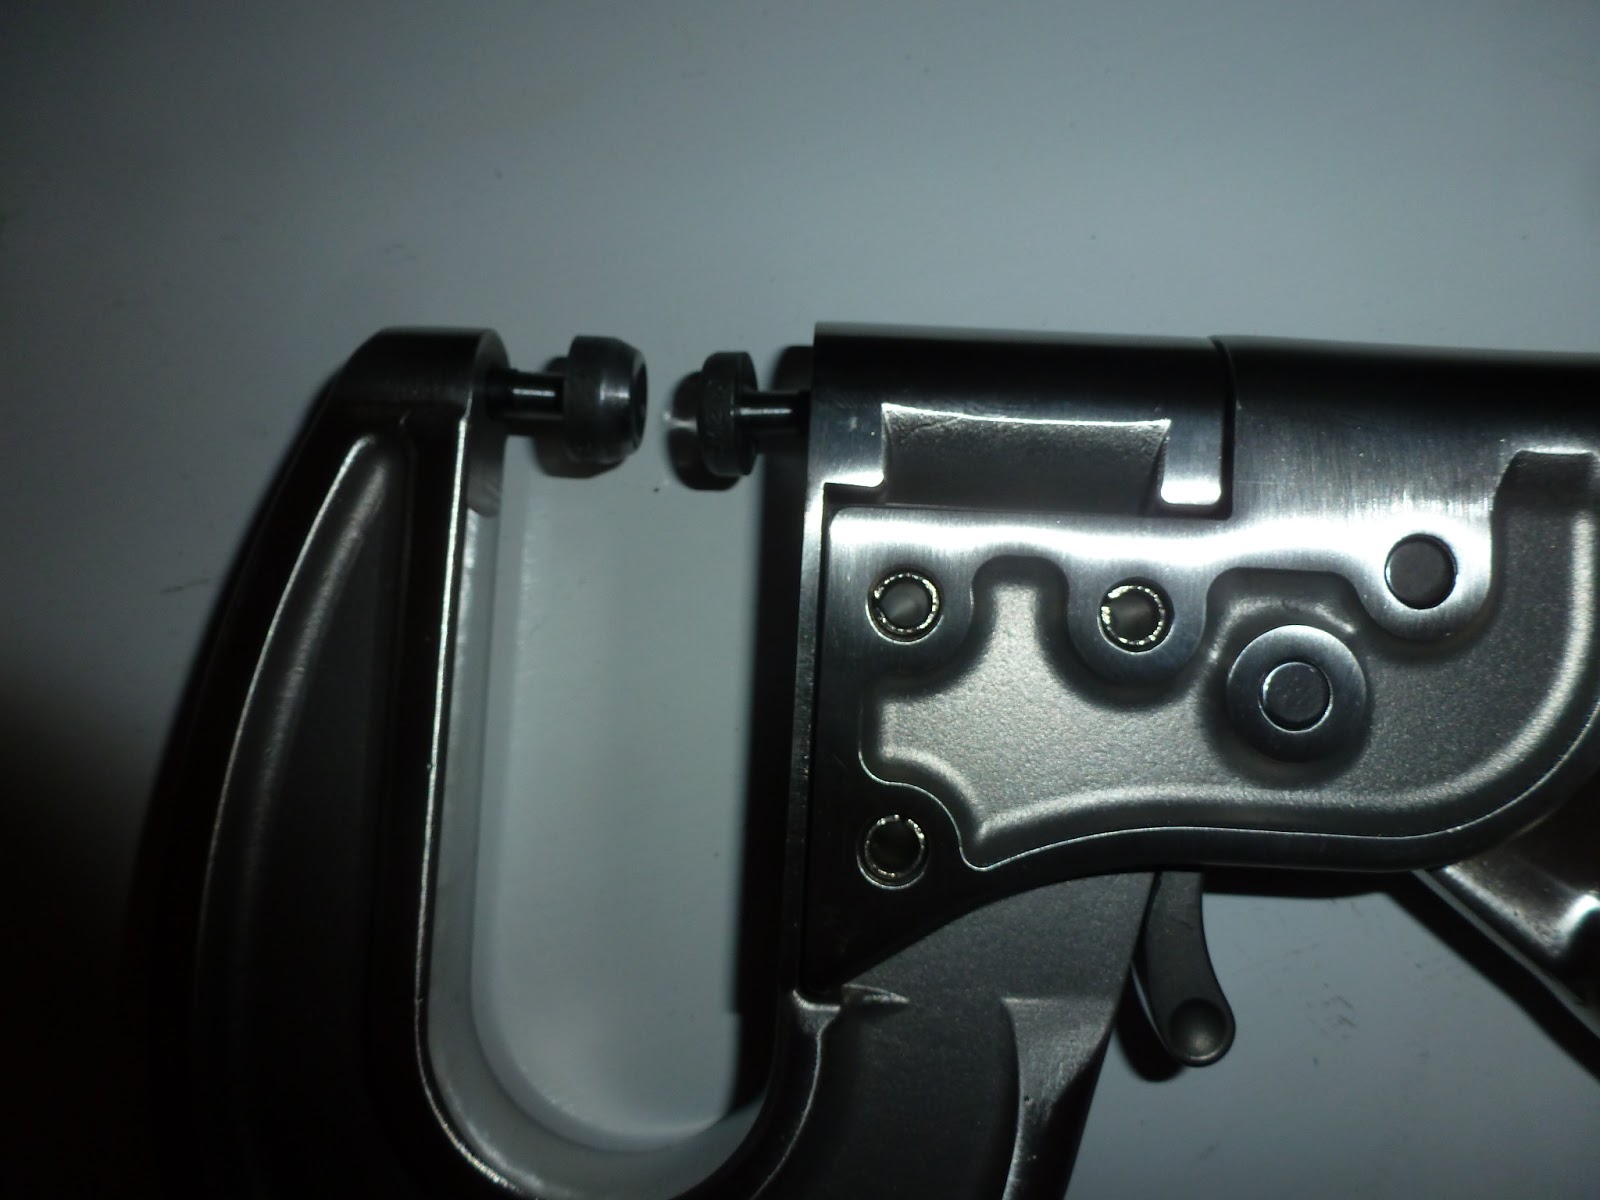
I used this hand squeezer for buck rivets from VTS to buck rivet the compartment door in.  You'll need to buy both squeezer dies here and here.  Don't be like me and buy only one die, the shipping on the second little piece is a killer!
As usual,  it comes with no instructions but I assure you the dies do fit into the holes on the "c" of the  puller,  it's just a tight fit! Here they are just barely pushed in.   The cupped piece goes on the tip of the "c" while the flush piece goes closest to the handle. Put a piece of blue tape on the cupped end, it won't slip off the head as easily and won't transfer any marks on the die to the pulled rivet. You'll have to replace the tape frequently.

  The pull can be adjusted by turning the bottom piece (that the flush die sits into) like a screw. This makes all your pulls the same.  When my squeezer came that piece was really stuck, I had to clamp the squeezer into a vise, lubricate it and use pliers to get it moving.  Some instructions would have really helped, especially since I didn't realize it was adjustable... I thought you just pulled it until you were happy with the tail....thank god for youtube.

Anyway, with a little help from my daughter I got the compartment frame buck riveted on.  It was a little tricky because the aluminum extrusion got in the way of the rivets expanding but it seems to be on firmly, definitely was a two person job.  She put the squeezer die on the head and held it there while I squeezed.  It was also tricky to get into position, tight fit.  Once you have it on you leave the  squeezer in place and just slide it over to the next rivet.  Hope that makes sense, it will once you realize how hard it is to get the squeezer into a position where it can squeeze. That's gonna take the cake for the most incomprehensible sentence I've written since I started this blog!

One last little note, the rivets that hold the door hinge on are something different. They are tubular rivets DF11-*-ST rivets  I did manage to track down a replacement, for anyone who is a purist you can find them at Hanson Rivet and Supply Company. The"*" is the length in 32nds  I just ended up replacing them with pop rivets because I didn't want to buy another set of dies for the rivet squeezer. 

Incidentally, these rivets make a good replacement for the tubular steel rivets on the arms of the jalousie windows.  If I ever do pull that window apart, (which f you know me you know  I will!) I probably will use them there.  The steel ones are an rusty eyesore (even if you hit them with aluminum paint like the PO did,  Lol). 

The one on the bottom right is the tubular rivet, I wish I had thought to take a picture of the other side.  The post is hollow and the die rolls back the edges.   I'll add a picture when I pull the next compartment.


Here's the final picture, note the lock because that's my next post! I still have the final polishing to be done and the aluminum gutter..... baby steps, people.


Sunday, June 23, 2013

This was a stupid idea...

These gutters were only used for a year or two,  then Airstream smartened up and made the gutter longer so it didn't dump all the rain right on the edge of the window.  Talk about a leak factory!  No wonder all my leaks are at the windows.  There is a ton of sealant on all the window seams on this trailer.  

I'm in a quandary, I really wanted to keep the outside of this trailer as original as possible but these are proving to be a nightmare.   I'm actually considering replacing them with the earlier eyebrows. The eyebrow style was discontinued in 1963,  so theoretically my trailer would have had them if it had been built earlier in the year. Okay, I'm justifying the decision a little....

But the thought of removing them all and replacing with the ones VTS carries is daunting.  Especially when I hear the white paint they come with is nearly impossible to remove.   Is there a way to modify them?  I have the tools but.....

What say you? 

Tuesday, June 18, 2013

Since I can't seem to......

....stop the leaks,  I decided to do the next best thing, Seal the floor!    Actually, I did this as soon as the weather warmed up so this post is long overdue.

These were my tools of choice.  I've always liked the West System.  It's a two part epoxy but the handy pumps make it foolproof even for a beginner.  Five parts resin to one part hardener but the pumps take care of the measuring. One pump from each dispenses the perfect ratio. 

It was a bit of a slow start as I noticed the neck of the large pump had a crack in it and I had to McGyver it with a hose clamp.  It soon broke anyway and the spring in the pump fell into the can,  I spent 15 minutes with a coat wire fishing it out and then called my local boat place to get a replacement pump.   Like I said, slow start!

I needed to fair (level) the floor first, fill all the holes from the elevator bolts, and fill the plywood seams.  So I mixed up batches of 12 pumps each, added the 407 filler, mixed again until it looked like peanut butter.  I used a putty knife covered with masking tape to fill in all areas and stripped off the tape after each batch so I could start with a fresh blade.

I had a bunch of plastic mixing cups, which I set aside after each batch, when the epoxy dries it's easy to pop out the hardened stuff and reuse the container,   Some places needed a second layer, which is important to do before it cures completely, otherwise this product can get something called an amine blush.   Which requires mechanical removal in order for the coats to bond.   Which would suck!

The next day, I sanded it all down and gave it three coats of the epoxy, again all done within a couple of hours to avoid the dreaded amine blush. 

I'm still going to have to go back and refair some areas and I missed one of the bolts, see right in the center?  Gheesh, how'd I miss that!  
 I also had a slight problem with bubbles in the epoxy, evidently this was caused by the temperature increase inside the trailer during the curing phase.  I probably should have waited for a cloudy day but they are cosmetic and won't show under the finished flooring anyway.

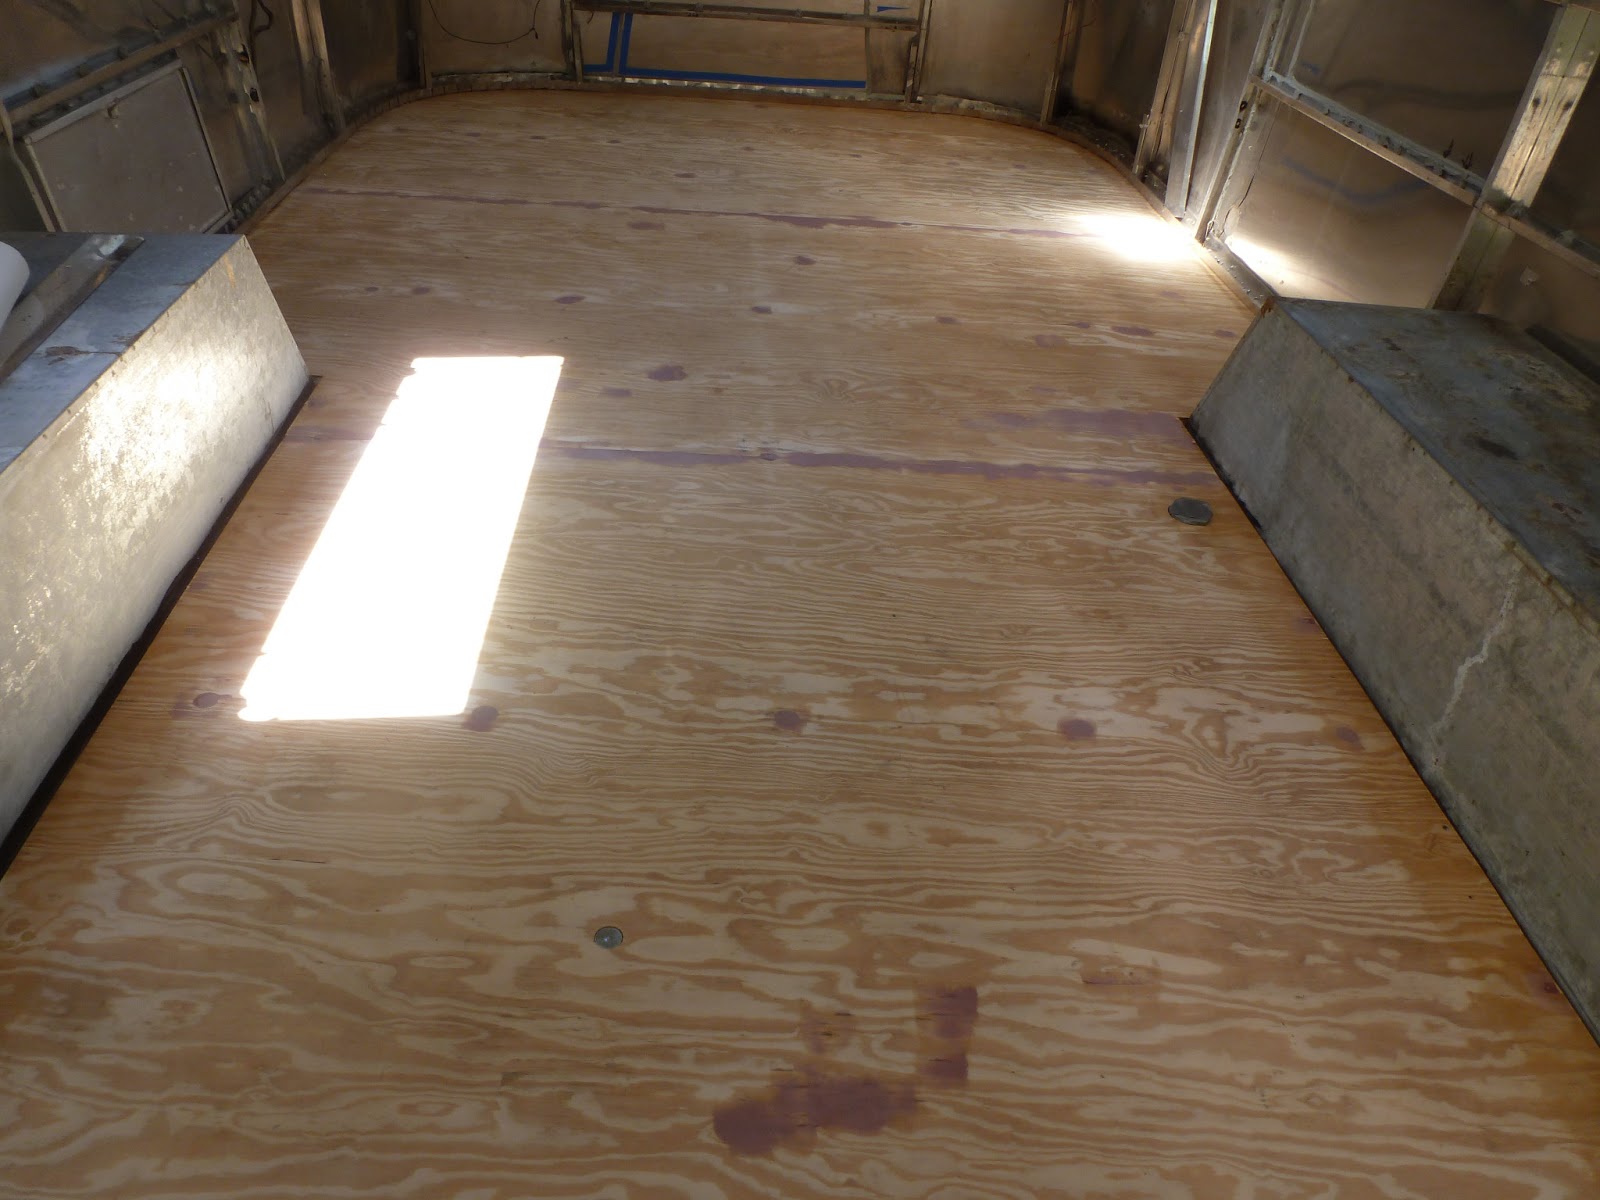
After the fairing and sanding


And after the three coats of epoxy.  I'm happier than a slinky on an escalator. So bring on the rain! 


My helper chose to spend the day with me, well actually I tied him up .....so forced to spend the day with me would be slightly more accurate (notice where he chewed through the  leash?) . Good thing I did too, cause look what saunters out of the woods and parades right in front of him?  

My trailer was fully chocked or I'm pretty sure Finn would have reinacted this:
Without the bike of course, Finn's smart but not that smart!!


Saturday, June 8, 2013

Painting the tongue and bumper

Well, it turns out polishing is not something that can be done for 8 hours a day.  I average 3 hours and at the end of that my hands look like crab claws!  It's really not easy to type that way! I know    .....Excuses, excuses ... The truth is I've been ignoring this blog because I am so far behind in catching it up.

I had my tongue and bumper covered with black plastic since we brought Moonraker home, evidently POR 13 is sensitive to UV exposure.  So as soon as the temps began to rise, I wanted to topcoat them. The step also needed to be topcoated.

I decided to use the POR Sterling silver paint.  I wanted something that was extra tough and hopefully last for a few years.  At $27 a PINT, this stuff better!   I also bought the POR self-etching primer because at this point the bumper and tongue had fully cured.

I always tape off the rim when I pour paints, it keeps the channel clean and its especially important with the Sterling Silver paint.

Evidently the paint adheres so strongly to metal that it will actually glue the lid on permanently! I put a piece of heavy plastic under rim between uses and didn't have a problem


I cleaned with Marine Clean, scuffed up all the surfaces with 300 grit, taped off anything I didn't want to get paint on ( I will return to this point later.  I know, you can't wait! ), painted one medium coat with the primer and a foam brush, waited thirty minutes for it to dry and then did 2 coats with the sterling silver.  Voila!


No pictures of the bumper cause I'm an airhead

My impressions?   I'm glad I used the primer which was light gray in color.  The sterling silver paint was like water, very hard to get a even coverage. If I had been painting it over the black POR I think it would have been more difficult.  I got a mostly streak free finish but I understand why people complain about this paint being streaky.

Would I use it again?  I don't think so.

First it's expensive -  $27 for the paint, $30 for the primer plus shipping!  And honestly I've gotten a better finish out of rattle cans.    And as I already own a 4 stage HVLP Fuji Paint sprayer (I collect tools the way old ladies collect cats!)  I probably would have been better off with an automative paint.

Remember that story I alluded to earlier?  Well when I removed the painters tape (the delicate stuff no less)  it actually removed the so called powder coat on my Bull dog jack!I just ran out there and took a picture of it in the poring rain so you could see. I'm nice like that.

 Powder coat that scrapes off with my fingernail?   Good job Bulldog!  I deliberately chose this jack because it has metal gears and is made in the USA.  Sigh, I think I'll rattle can it and see what holds up better!


On a side note My helper turned one recently..... Happy Birthday Finnegan!


Wednesday, May 15, 2013

Shiny, sort of.

Polishing is kicking my butt!  I try to keep posts to this blog light hearted but it turns that polishing may be a dark art, disturbing and unsettling in it's very nature.  I have tried a variety of polishing methods but I'm sorry to report that shortcuts don't exist. 

I finally settled on the Jestco method that I saw demonstrated by Levon at the Restoration Rally in New Mexico.  See here for the instructions.   Jestco actually makes an Airstream polishing kit.

Levon's a funny guy and I'm starting to think that a sense of humor is necessary.   At the very least it helps.  

 I started with the grey rouge bar but had to drop down to the more aggressive black black bar that I got from Caswells.  The grey just wasn't cutting it...... literally.   I'm about 25 hours into it and still learning.  That's a heck of a learning curve!  There's an optimum speed, amount of polish, even a temperature of the metal and air.  I'd share with you what they are but I haven't figured it out yet!   All I know is that some days it goes great and other days I feel like I'm going backwards.    Every single panel seems to have a "sweet spot"  and none are exactly alike.

Today, I started getting little tails of dried polish under where I was working.  What's up with that!  I had to keep stopping and removing them.  Maybe because it was too cold?   I use the rouge pretty sparingly. 

I also  find myself going through something like the five stages of grief  errr  polishing: 

Denial - I know everyone says polishing is bad, but it won't be for me.. after all.I like the detail stuff, some Itunes and the right tools and it'll be great!

Anger - Four hours  today and that's all I have to show for it!! A cloudy mess!!

Bargaining - One more pass, just one more pass and I'll be able to move on. 

Depression -  Okay, it  took me 20 Hours to do this one section, if I continue at the same rate I'll be done uh uh uh   next year?

Acceptance  - Looks pretty good..........from 25 feet away!

I just got a phone call from my sister,  turns out my daughter called her and said " You have to talk my mom down from the polishing tree."    Ha Ha Ha     Sis tried to commiserate with me but since her husband has done all the polishing to date, I'm not buying it.  Hey sis, call me back after you've put in your first 25 hours.

Tomorrows another day and no,  I'm not posting pictures.   I'll post pictures when I'm happy with how it looks,  maybe never.