Monday, September 28, 2015

So who wants to see my Zolatone?

Well..... You can't , not really.....I mean... it photographs like a Yeti in a blizzard   Okay you had to be in Boston for the Blizzard of 2015 to get that reference, but really it does not photograph well.   That being said here you are!
 Here's a closeup ... not that it shows up any better lol.
I like it!   Way more than I thought I would.   It's color number FLX-0032.  Its a creamy yellow with caramel colored specks (they call it cracker crust!)  The sample I got from Zolatone  had a lot of darker brown in it, but mine didn't come out exactly like the sample. There's far less brown which is what I was hoping for. It's also way lighter than these photos suggest.

My experience with Zolatone Flex was very positive.  They recommended that bare metal be primed with a good primer.  I used Benjamin Moore Fresh Start which I've talked about in my last post.  Based on the fact that I was able to prime Moonraker with two coats in just a little under a gallon of primer,  I ordered two gallons of the Zolatone basecoat ($27 each) and three gallons of the topcoat $110 each).   Which by the way, is way less than the estimated coverage.  By Zolatone's coverage estimate,  I would have needed more like 5 gallons of the topcoat, for example.

The basecoat gives the surface its texture and the topcoat gives it the speckled appearance.   I was able to do two coats of primer using up  1 2/3rds of the two gallons of base coat.  The top coat was supposed to have less coverage and it did, I ended up using 2 3/4 gallons out of the three.  I cut it kind of close and I didn't let anything go to waste, taking a spatula to the paint can (really kinda wish I hadn't used my Williams Sonoma spatula,  as I had to chuck it, sigh ).  And when I say I didn't waste much I mean it .... See?


I also did not paint the window frames or refrigerator flue (which I still need to build).  So to keep my reserved paint for the refrigerator flue,  I only did one coat of the topcoat on the wheel wells.  So if you are ordering based on my experience, take that into account!    

They send you one specialty foam roller and one sample card.   When I ordered my sample cards originally they sent me a large (8x10) sample.  I highly recommend you get samples because the colors on my monitor were very different from the real colors looked like.   Also spend the money and order a second specialty foam roller.  By the time I got through my second top coat, the roller was matting down and I wasn't getting a consistent speckle pattern. 

Other tips?

TAPE OFF EVERYTHING.  This stuff SPLATTERS!!!   If you roll slowly you can mitigate some of it.  I am an extremely neat painter and figured I didn't need to tape off the electrical wires, that was a mistake.   And don't expect to go to a fancy dinner that night.  I needed a couple of days for this to wear off, my camera and fitbit are still covered in splatters.

Also, take out your window screens,  paint doesn't clean very well off of them.  Yep, the queen of doing it again strikes! Thankfully I only had to re-screen one, before I wised up and removed them.

Overall though, I am really happy with the paint.  Total cost was  about $402 plus $68 shipping ( not including the $50 for the Benjamin Moore Primer).  I think that's about half what the oil based spray-on Zolatone is, especially if you need to buy/rent a paint sprayer.  

Speaking of which, I recently had a fellow Airstream visitor John (65CV)  drop by.  He has a true Zolatone finish (that is sprayed on).  My impression was that the texture was very similar but my flecks were MUCH more subtle.  Here is his Overlander having a reunion with Moonraker!

Remember my patched section where the refrigerator flue would be?   It came out great! The texture really helped hide the patching job...
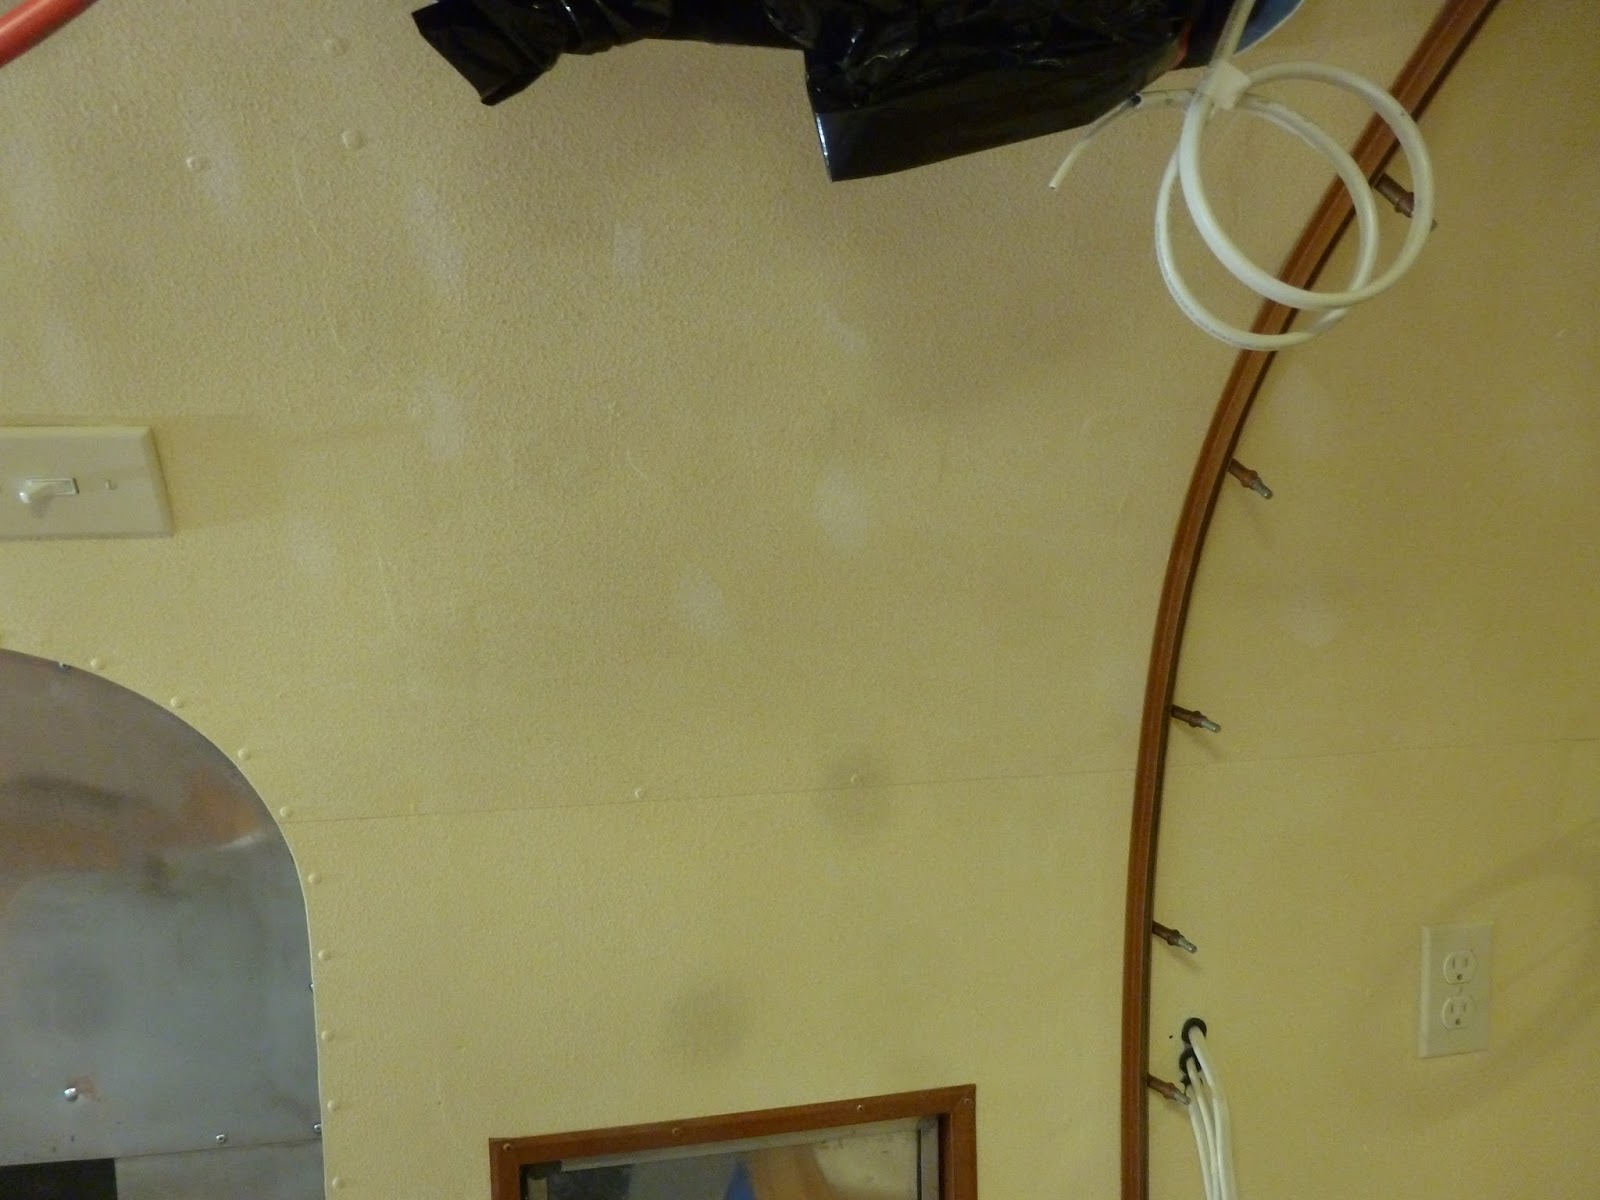


I also installed the lights...
Two sconces on either side in the front (if you bid against me on Ebay for these I'm really sorry.....just saying.....)  Love the tiny stars!


 These have the LED bulbs from m4products.com.  They still honor the discount code from the VAP, (Vap5) will save you five percent.  They aren't cheap at $19 a bulb but they won't drain your batteries and they are BRIGHT!

Overhead light is my favorite!   Its casts little starbursts all over the ceiling...


 I did got all my window frames cleaned up and spray painted.  I used a hammered  copper paint from rustoleum.  Copper will be a recurring theme in Moonraker.  I'm in love with the warmness of copper, Stay tuned for more on that front!

Now for the bad news... About a month ago I fell and injured not only my rotator cuff, but my deltoid in my right shoulder.  I'd like to say it was doing something daring...  like polishing and falling off my Airstream, or getting thrown from my horse,  but nope, it was one of those garden variety getting up half asleep in the middle of the night and simply tripping and.... well  I went over like a felled tree. 

Xrays, numerous Dr. visits and mucho Physical therapy later..... I'm finally getting some use of my arm back.  Thankfully, I'm improving enough that they are saying surgery isn't necessary.  I still have very little strength though, can't even hang onto a screwdriver.   

Which means that work on Moonraker is at a standstill.   Just when I get to the fun part! 

Meanwhile,  I've got a  Propride waiting to be installed.... NOT going to happen soon as it weighs a ton.  The TPMS system I think I can handle (the little sensors are only a couple of ounces lol)  

Anyway, as I couldn't work on her, we decided it was time to hit the road.  We've spent the last couple of weekends at Greenfield State Park (NH), then Salisbury State Park (MA)... This past weekend we headed north to the Loon Mountain Area (NH).

Sleeping on the floor on mattresses has moved up the beds to the PRIORITY ONE
list !!!  Just got a load of bending birch and Baltic birch.... itching to get started!!!

Oh, and I went to the Brimfield Antique show and picked up three of these aluminum riveted beauties.  They have wooden slides on the bottom and we've been using them to store stuff in the truck bed !  Love them! They even have metal flanges on top (in the corners) so I can stack them or put a piece of wood on top to use as extra seating.

And one of my favorite pictures from our trips.  Finn with the Airstream behind him!


Tuesday, July 28, 2015

Paint prep

Paint prep took forever.....

 I was so eager to get to the Zolatone that I forgot my wheel wells should probably go in first.  The plan was just to pull out the wheel wells from storage, give them a good sanding and install.   Well you know how plans go.....  I started to sand and they smelled awful, that same old  "50 year old trailer that was used as a habitrail" kind of smell.  Then looking closer,  all the rivets had pulled through the fiberglass and there were holes and cracks in more than a couple of spots.   Do it once and do it right, Right?

I stripped the paint off, repaired all the weak areas with fiberglass/ filler (particularly all around the bottom flange) and West System epoxy.  Then I even gave the whole thing a coat of epoxy to stiffen it up and seal in any odors.   Then I re-attached the aluminum top and sanded it all to prep for paint.


I installed it using butyl tape to seal it to the wall of the trailer.  Of course after I had riveted it all in place, I realized I had never removed the paper backing on the butyl tape!   So one of the wheel wells I actually installed twice. GRRRRRR...  Then there was the gray water tank inlet (covered in blue tape below)  that was blocked by the flange.  My trusty rotozip took care of that!  

I also buck riveted the door.  I have a awesome hand puller that I was planning on using but of course the rivets were too close to the inner edge so I had break out the compressor and the gun.  I have a really nice tungsten bucking bar that I love .  Its very heavy and compact.   I have small hands and I really hate how so many tools are hard to use because they are too big (like the hand riveters, they KILL my hands!)  And yes, I know they make woman sized tools, but pink tools (or god forbid floral , shudder) are not a big fav of mine! Anyway, this bucking bar is sized right and does an excellent job.   


I also made a patch for the water filler.  Back in the day Airstream just pop riveted random strips along side of it to close the gaps, Mine looks a whole lot better!  No mice highway here!

I had this awful area where someone threw up a patch to cover the old refrigerator vent.  The holes were very large and if I filled them with rivets it was going to look awful.  I opted to patch them all with Marine-tex.  Its a two part epoxy used to patch holes in aluminum boat hulls.   It did a great job patching the rivet  holes and was surprisingly easy to sand.  Which was a good thing because their "sag free" formula was not exactly sag free.


I promise the next post will be about Zolatone!

We have managed to have some fun this summer, just back from a week on the Cape, Great fishing - mine was the smallest fish at 21 inches and had to be thrown back so I got to take the picture instead!

Wednesday, July 1, 2015

Missing me?

It's been a while!

I've been steadily working away on Moonraker, sometimes sidelined by life but c'est la vie!

Mostly I haven't posted because the things I've been working on are tedious and would make for some very unexciting posts.

I've cleaned up and polished the window screens and reinstalled.  Used my old standby, Scotch brite pads and wd40 to clean and polished them with 3m compound.    I used solar screening and it's very dark but has the bonus of keeping some of the heat at bay and should reduce sun fading of materials.  I also stripped all the framing  for the windows, Not sure if I'm painting or polishing those but it's nice to know that I didn't lose one! That was a heck of a job due to the previous owner gluing velcro on with gorilla glue to hang the curtains! Then there was the one that had ancient duct tape all around the edges holding the screening in place?   Seriously dude?  not rocket science.....
 This is the window screen frame that is no longer made.  Its got some nice detail to it.   I'm missing a couple so if anyone replaced theirs and still have the old ones hanging around I'd love to negotiate a fair price!


The big news is the skins are in!   There was a lot of fiddly stuff.  I expected having to trim a few panels at the floor because when Colin did the shell off, he noticed it was not square and tweaked it.   But I did not expect to have to trim the bottom of EVERY panel!   Plus there were outlets to be added and holes to patch.  I think I put in (and out ) every lower panel at least three times.   I was pretty much working by myself, so it took me two weeks to get them all back in . 

On to Paint prep:

I cleaned everything with Krud Cutter. I sanded all the surfaces with 150 grit and an orbital sander and cleaned again.  When I stripped the panels, I didn't know if I was going to polish or paint them.  Paint won out and I really wish I had sanded them when they were flat!  Hindsight, learn from my mistake!

Then painted with a product new to me called Stix.   It's a Benjamin Moore product and claims to stick to glass and slick surfaces (including aluminum).

It's cured now and absolutely cannot be scratched off so I'm guessing it will do it's job


I've finally decided on a paint color.  Its Zolatone Flex paint in color 0032.   Its a cream base with lots of caramel overtones.  It's a newer roll on product and has a more subtle fleck than the original Zolatone. I ordered two gallons of the base and three of the topcoat.  I used a gallon of primer for two coats so hopefully this will be enough.  Cost?  roughly $400 for the Zolatone and another $50 for the primer.

My hands need a break!

 Oh, and I added a new accessory to Moonraker! A Silver GMC 2500 Sierra fresh off the line! A whopping 2900 lbs in Payload which made me do a happy dance.   Pretty sure the dealer thought I was crazy to get so excited about a door sticker.  It's fun to drive but not so easy to "bang a uey" in it! Or pahk it (sorry, only in Boston!)


Saturday, February 14, 2015

Digging out!

Yesterday I needed to dig out Moonraker, as we are in the midst of yet another snowstorm with over a foot expected. Next year this trailer is either headed for warmer climates or it's going under cover!

Another foot and it would be over the windows!


 At least after digging it out, the snowbanks are tall enough that snow shouldn't drift into the Airstream.  That's called looking at the bright side LOL...


This was pretty, until I realized that these ice crystals were INSIDE my trailer!!


It was a gorgeous day, but bitter cold, How cold?   Cold enough that whenever I touched the trailer, my gloves kept sticking to it! Brrrrrrr

 All done for now!  Good thing I opted for the manual jack and the higher angle on the axles!

It's snowing right now with blizzard conditions tonight and Thundersnow expected!.  Yeah, cause we weren't having enough weird weather lately...... Jeezum crow.

Monday, February 9, 2015

Got Rust?

Well, its no news to anyone that the Northeast is currently having yet another winter storm.   This is the third major storm in two weeks including one official blizzard.  To add insult to injury the groundhog not only saw his shadow but emerged in the middle of a snowstorm!

So what's a person to do?

Snowshoeing works! At least it does if you don't have a eager Border collie that's stepping all over the back of your shoeshoes!


There's a car under here somewhere....I think.

Moonraker has seen more than its fair share of snow and because the skins aren't in yet (just the endcaps),  we are continuing to remove snow from the roof.  It's gotten pretty old, in fact the snow is so deep, just to get out to Moonraker is a major challenge.  The snow is mid thigh and that was before the two feet we got yesterday and today!   

As New Englanders are fond of saying.... ya can't get they-ahh from hee-yahhhh.

 There's a bumper under here somewhere....I think.


Enough about snow!  The topic for today is rust!

I picked up a couple of fixtures on Ebay recently and they were covered with a good coating of rust. 
I soaked them in a couple of quarts of water with a few tablespoons of Oxalic Acid,.  And they came out beautifully.  This isn't really  a well known trick,  so I thought I'd show you the results here.

First, this is Oxalic Acid, commonly known as wood bleach.   It can be found at any decent hardware store (including the big box ones).  I have always used the powdered stuff, but I guess it comes in liquid too. 

I added a couple of tablespoons to a plastic bin of water and soaked the parts for a couple of hours.  This isn't an exact science and some people leave really cruddy parts in overnight, I didn't need to do that as this surface rust dissolved pretty fast.

Before....


And After....


How many of you just tilted your head sideways!  LOL  Sorry about the orientation change!

Okay, if I'm being really honest, if you put your nose right up to it you can still see the remnants of the corrosion/pitting.


 But from a foot away they look great!  A little polish with some Wizards, and a coat of  Jubilee wax and they are SHINY!


So go dig out that rusty stove top and clean it up!  I'm off to play in the snow with my buddy Finn!


Thursday, January 8, 2015

Catch up time!

Okay, the solar pre-wire is in, we unjacketed the 6 AWG wire and put it in two separate holes, running it from the refrigerator vent to the front end cap and down. 

The air conditioner drain will be a pex line with sharkbite connectors to make the turns, no it isn't done yet, stop snickering.  The holidays were busy and I have the supplies, I just kinda lost them.  I refuse to buy those super expensive sharkbite connectors again,  so until they surface that project is stalled.    Its currently -7 degrees outside, with a windchill of close to -25 degrees. Its difficult to even think about air conditioning!

In the meantime I thought I'd catch up on other things:

The two LED wedding cake lights in the back had grounds that I pop riveted to the ribs.  I've re-thought that (like nearly every other project I've done so far!) .  They are buried in the walls , never to be seen again, so I've reattached them with stainless #8 panhead screws with lock nuts.  I even hit them with a bit of Locktite and I'm fairly certainly they won't budge for the next millennium.  If they do the ground wires are long enough to pull to the outside of the shell and figure out some sort of outside screw.


My insulation is complete, but there will be a few adjustments as I put panels in.  the insulation was far more time consuming than I thought,   especially when you have a helper (not!) like this!  

I have covered all the ribs with 1/32 inch foam tape.  This has already made a huge difference.  I can touch the ribs where the tape is and it's not cold, the rest of the rib is freezing.  I've also noticed when the snow starts to melt, usually where the ribs melts first, leaving this telltale crosshatching, that no longer happens!  Is it going to mean a warmer trailer?  Who knows... but it was easy and inexpensive.  Plus it's a doublesided tape so I can not only rivet my interior panels in but they will be secured by the tape too!

This is the stuff I used.  http://www.findtape.com/product153/Scapa-SR532V-Double-Coated-1-32-Foam-Tape.aspx?idx=0&tid=0.   In case the link doesn't work for you, it is Scapa SR532V Double coated 1/32" x3/4"x 72 yards in white.  It sells for $16.75 per roll.  That's less than 34 dollars to insulate all the ribs!  
 A shout out to  Capn Tom on Airforums,  whom I got the idea from and who kindly sent me his excess tape!   It took two rolls to do the Overlander. The only issue I had with using it was that it makes it really hard to find the rivet holes.  After applying the tape, I used a bamboo skewer to punch them all out and then marked the holes with a black sharpie so i could match up the holes to the endcap/interior panels holes easier. 

Which leads me to THE BIG NEWS..... which is the endcaps are in!   I was really dreading them due to the experience of helping my sister put theirs in .  Story found  here, as I remember,  it took 5 hours to get one end cap in.   But I didn't have the same problems with ours, maybe because I had stripped all the paint off and the fiberglass endcap was surprisingly flexible?  The back one went in in literally 15 minutes and I honestly think I could have done it alone!!  The front one took a little longer

But I've jumped ahead in my ADD sort of way.  There was alot of work in prepping the endcaps. I've posted previously about how I cut out the shelf in the front endcap.  But I also had to do some cutting out and re-fiberglassing of the rear end cap  There was this odd shelf protrusion that the light came off of that interfered with the clean curves of the end cap.

This is the piece I cut out of the back end cap.
 I used a drill to drill holes in then four corners, then a jigsaw to cut the area out.
 I put a piece of heavy plastic (so the West System wouldn't stick) then a piece of prodex taped in place behind it.  I braced the whole area from behind with a piece of 4 inch thick foam and a 2x4 to get as close to the contour of the original shell as I could.
I then patched it with two layers of fiberglass and the West System fast cure a couple of hours apart. .  I then washed it down with water and sanded it to remove the amine blush.  I added another layer of epoxy mixed with the microlite filler beads when the fiberglass had finished curing.

The completed patch... after lots of sanding.  I can't believe I was doing this in my house the week before Christmas!.... but it was too cold outside for the expoxy to properly cure.

 In place!

I doubt once its painted anyone would know that this is a patch.  I keep waffling about the finish of this rear end cap.  Originally I wanted to do it in copper,  but it turns out that that would be about $4,000 in materials alone.  Reality check! LOL  

The truth is that I have this special talent for falling in love with expensive things, a gift for it really!.  If you ever need someone to come with you to a store to choose the most expensive item, without looking at price tags, I'm your girl!   Strangely enough,  I have yet to find a use for this hidden gem of a talent....I did however pass the talent along to my daughter.  LOL 

Any hoo, I'll come up with some way to mimic copper, or I'll woodie it like I'm going to do in the front.

Also, for those who are wondering, this is how much Prodex I have left of two rolls after completing two full layers , I also cut 1 layer of insulation for all the windows to use in extreme cold boondocking that just will pressure fit into all the windows.

I also chose to insulate directly to the back of the end caps.  There was already a layer of foam strips followed by Prodex, followed by more foam board strips on the shell itself..... so this makes two full layers of Prodex with foam strips to hold the insulation away from the shell and between the layers.   


That's all for now, the plan is to try and get the interior skins in this winter/spring....we"ll see how that goes! Stay warm people!

Wednesday, January 7, 2015

The devil in the details....

Okay, so I have a two final details that need to take place before my skins go in.  Our electrician was here last night and gave us the go ahead to proceed! So we are almost ready to cover it all up except for.....

Solar
We are prewiring for solar with #6AWG.  The plan is for at least 200 watts in flex panels from AM Solar (assuming the tests Lewster is doing pan out)  I know most people go thru the refrigerator vent, but then many people have their batteries in close proximity.  My batteries on the other hand are up front under the window.  This would require going through three ribs (mostly above the door with frankly HONKIN' big holes.  I'm not even sure there is room to grommet after they are drilled because the flange on the rib gets in the way. I suppose I could "unjacket" the wire?    I'm nervous about doing these holes in this area as alot of these ribs in the sixties trailers don't go all the way from one side to the other.  I did brace the ribs to the stringers but its an inherently weak point in the structure.   Here's the area in question

Alternatively, I could put the wire somewhere near the front astrodome (that would mean drilling through one rib) and running the wire down the endcap.  This would require putting a combiner box on the roof and drilling a hole thru the roof :(  which makes me hyperventilate.

I'm thinking the second option is a little better but could be persuaded differently.


Air conditioner drain

 In the unlikely event  we ever put an air conditioner on the roof, I'm putting in a drain line just in case.  Somewhere on the forum I read it should be 1/2 inch inner diameter.  That is a really big hose!  If I place it street side leading down to the wheel well if has to go through one rib and 4 stringers.  I wish I could draw on these pictures but I don't have a way to do that!!   Basically it would be through the stringer at the back of where the fantastic fan now, and then down through the stringers like the black pipe (the water tank vent).

Is it really necessary for it to be this big? Can I use a smaller tube and adapt it somehow to the tube at the air conditioner? 

All this work for something that will probably never happen!  Unless we move to Texas.....and I break my leg and am stuck in the trailer with a cast on.... and the planned air conditioner never works out..... yeah, get the picture? 

So any suggestions?   Other than to stop overthinking things and just get the interior skins in!!!!!